Wednesday, 21 September 2011

Over the rainbow

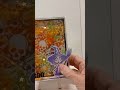
My turn to host the challenge in the Crafty Secrets member forum at Splitcoast Stampers this week (here). We're taking inspiration from the Wizard of Oz, either by going over the rainbow (using at least three completely different colours) or drawing on the movie's icons (red shoes, yellow brick road, wicked witch of the west etc) as project themes.

I chose the colourful option and used chalks to make a freehand rainbow on the image panel and used the same colours around the edges of the card base, too. Chalks are often neglected around here and it's fun to pull them out for a play every now and again!

Stamps:
Vintage Silhouettes (Clear Art Stamps by Crafty Secrets)

Paper:

Neenah Classic Crest

Ink:

Versafine by Tsukineko (Onyx Black)

Other:

Chalks by Pebbles Inc
Silk ribbon
Vintage buttons
Sewing machine and thread


Thanks for stopping by!

Friday, 16 September 2011

Forever Autumn

It's time for a new postcard swap on UK Stampers - Effie has given us the theme of "autumn" for September's swap.

I'm really not managing much crafty time at the moment so a postcard was perfect for me to squeeze into a half hour of inkiness.

I think a shaped card can have more immediate impact so as time was limited and I wanted to make an impression quickly, I die cut some ivory mountboard for my base. I stamped the bill of sale twice (easy to mask with the straight edge of a Post-It note to give the impression of layering) and then added the crow in the corn, the harvest baskets and some leaves coloured with Copics. A bit of Vintage Photo inking round the edge and I called it done.

Stamps:
Autumn Leaves (A Little Bit Sketchy line from Sheena Douglass)
Fall Harvest and Can it (CHF, retired)

Paper:
Ivory mountboard (freebie offcut from a framing shop)

Ink:
Tim Holtz Distress ink by Ranger (Vintage Photo)
Adirondack dye ink by Ranger (Espresso)
Versafine by Tsukineko (Onyx Black and Vintage Sepia)

Other:
Copic markers
Tim Holtz Alterations die (Baroque)


Why not come and join us if you fancy getting a lovely handmade postcard in with your usual bills and junk mail? As usual, it's a low-commitment swap, just make one postcard and you'll get one in return so it all it costs you is a bit of time and the price of a stamp. Your card must include some stamping and be capable of going through the post without an envelope but other than that you can create anything within the theme. See what people are making for the swap here.

Thanks for stopping by!

Monday, 12 September 2011

Say what?

The chipboard speech bubbles from Tando Creative are great fun to use with character stamps to have them "say" the sentiment on a project and provide a touch of dimension at the same time.

This is a birthday card for a boy celebrating his seventh birthday - very simple with just a stamped image and the chippie speech bubble coloured with a Copic marker and stamped with the birthday greeting. A bit of inking through the smallest holes on the sequin waste mask finish off the image panel and the chippie. I couldn't resist a little Kaz-style doodling for a border.


Speech Bubbles Small (Tando Creative chipboard)
Sequin Waste mask
(Tando Creative)

Little Guy and So Happy stamps (CHF stamps - retired)
Versacraft Spring Green ink
Brilliance Graphite Black ink
Copic markers
Copic Multiliner
White and black card


Thanks for stopping by!

Thursday, 8 September 2011

Autumn harvest

It's challenge time on Tando Creative and this month's theme is Rustic Charm. There's a prize on offer - the winner can choose from this fab list!

I cut one end off a large journaling block and inked it in green. The rest of the block is inked in two shades of blue with a torn paper "cloud" template. I turned the green piece around and stuck it down as the ground for the tree to sprout from.

The twigs are gathered from my garden and tied with raffia at the base. Stamped apples and a tag hanging from a branch finish off the tree and the whole thing is finished with a "rusty wire" hanging loop. Always keen to make use of what I already have rather than buy new supplies, I used florist wire coated with Vintage Photo Distress embossing powder to make the rusted wire.

Supplies:
Large journaling block (Tando Creative)
Autumn Harvest and School Primer stamp sets (both CHF, retired)
Tim Holtz Distress ink by Ranger (Tumbled Glass, Broken China, Bundled Sage, Vintage Photo)
Adirondack dye ink by Ranger (Espresso)
Copic markers
Natural raffia
Tags Trio dies by Spellbinder
Twigs
Florist Wire
Distress embossing powder (Vintage Photo)


Rustic charm is perfect for autumn projects - why not check out the details of the challenge here and come join us to be in with a chance of winning the prize!

Thanks for stopping by!

Monday, 5 September 2011

Play until the sun goes down

I've been so busy with work just lately I've had very little time for crafting or blogging. I was feeling a little stir-crazy though so I made time for a bit of inkiness on Friday!

The current challenge in the Crafty Secrets member forum over at Splitcoast Stampers is being hosted by Cyntia and she's asked us to use orange on our projects.

I've made a sunset by sponging inks through a hole cut with a Nestie for these delightful silhouetted children to play in - even the dog is joining in and having fun before somebody shouts "Time for bed!"

The figures in this set are separate so you can change up the look of the group by putting them in a different order, repeating some or missing some out. I think it's a really sweet little set.

I added sparkle to the sunburst above their heads with a Spica pen.

Stamps:
Vintage Silhouettes (Clear Art Stamps by Crafty Secrets)

Paper:
Smooth white
Black

Ink:
Tim Holtz Distress by Ranger (Mustard Seed, Spice Marmalade, Fired Brick, Antique Linen)
Versafine by Tsukineko (Onyx Black)

Other:
Spica glitter pen (red)
Nestabilities by Spellbinder Large Circles
Silk ribbon
Stick pin
Tracing wheel
Score- It
Corner Chomper


Thanks for stopping by!

Tuesday, 16 August 2011

Christmas ornament

I'm hosting this week's challenge in the Crafty Secrets member forum at Splitcoast Stampers and I'm asking people to use squares in their projects.

I've opted to use the square as my card base and added another to my stash of Christmas cards.

This is one of those projects that looks better in real life than you can manage to capture with a photo! The ornament is coated in glitter above and below the banner area and the little gems to represent lights on the tree really do glow if you catch the sun right! Those are things that tend to show with movement I guess and a still photo leaves it to your imagination to fill in!

I like to do "all one stamp set" projects sometimes rather than pulling in stuff from several sets and/or makers - it makes you focus on how versatile the elements of a set can be! I used four of the stamps in the set here - the elegant ornament, the separate sentiment banner that fits on to it, the snowflake for subtle background pattern and the fir sprig to build up the overhanging branch at the top.

Stamps:
Christmas Joy (Crafty Secrets)

Paper:
Cryogen white
Dark red
Gold

Ink:
Versamark by Tsukineko
Versafine by Tsukineko (Olympia Green)
Tim Holtz Distress ink by Ranger (Antique Linen)

Other:
Detail gold embossing powder
Glamour Dust glitter (Crystal)
Gems
Memento marker (Cottage Ivy)
Wire
Foam dots
Gold gel pen


Thanks for stopping by!

Friday, 12 August 2011

Time for tea?

The theme for the August postcard swap on UK Stampers is tea time. As usual for this swap, postcards need to be posted "naked" so no bulky embellishments or bits that might get damaged or ripped off under the gentle ministrations of Royal Mail's finest.

I went for a retro look. I thought repeat stamping the tea cup in muted shades had a bit the feel of 50s kitchen textiles which went well with the Tanda lady stamp. I didn't want to fiddle with cutting a mask so I stamped the cups first, stamped the lady and then bleached her face and hand to get rid of the teacup outlines. She's coloured with Copics (carefully since I'd stamped with Versafine!). For a bit of glamour, she has a touch of Copic Spica glitter pen on her lips !

A vellum overlay with a bite cut out of it is stiched over to throw the lady into the spotlight and the whole lot is stuck to a second piece of card so the back is tidy.

Stamps:
Retro Women 2 (Tanda Stamps)
The Cafe (CHF, retired)

Paper:
Cryogen white
Vellum

Ink:
Tim Holtz Distress ink by Ranger (Tumbled Glass, Bundled Sage)
Versafine by Tsukineko (Onyx black)

Other:
Copic markers
Copic Spica glitter pen (red)
Sewing machine and thread


Why not come and join the swap if you fancy a bit of happy mail in with the bills and junk? It's not a big commitment - just make one card and you'll get one in return. Details here.

Thanks for stopping by. Is it time for tea, yet?!

Wednesday, 10 August 2011

Enjoy the journey

Embracing wrinkles is not something that comes naturally to many a 40-something but it's exactly what Marcy asked us to do for a recent challenge in the Crafty Secrets member forum at Splitcoast Stampers.

I had fun scrunching, twisting and generally abusing a piece of kraft cardstock to get it really good and wrinkled. I then brayered Latte ink over it to produce a nice leathery-looking piece to use as my background for a little collage.

I think this little boy grew up with an interest in natural history - he has a leaf skeleton, a fossilised seahorse and a star in his collection of treasures. The seahorse has been in my collection of random embellishments for an age - I made it from paper mache in a mould.

Stamps:
Journey and Artsy Banners (both Crafty Secrets)

Paper:
Kraft and Cryogen white

Ink:
Versafine by Tsukinkeo (Vintage Sepia, Onyx Black)
Adirondack by Ranger (Latte)

Other:
Vintage photo (unknown maker - still using up stuff from my 2009 Secret Santa parcel from Caroline!)
Paper mache seahorse
Skeleton leaf
Star nailhead
Sewing machine and thread


Thanks for stopping by!


Monday, 8 August 2011

Go wild with Tando Creative!

The challenge for August on the Tando Creative Challenge blog is to Go Wild! With a prize up for grabs, why not let your own creative juices run wild and play along with us? The theme is totally open to your interpretation and you don't have to use Tando products on your entry (although if you do you'll get a double chance in the prize draw).

Kaz, Karen and Angela have already shared some fab samples with us and this week Carol and I are going wild too. You can see Carol's project as well as this one of mine here.

I haven't quite decided what this is destined to be! I might make it into a mini book cover and then again I might just give it a little stand and have it on a shelf.

I started with a sheet of the Tando greyboard which is really sturdy. I gave it a spritz with water to help the embossing along a bit and ran it through my die cutter in a Texture Fade folder. I used acrylic paints to give it the appearance of baked earth - the plains of the Serengeti, perhaps! Dark brown was rubbed all over the sheet, making sure to get well down into the embossing and once that was dry I used a sand colour over the top, keeping it just on the higher spots.

The leopard and map of Africa are stamped onto plain white cardstock, cut out and stuck over the base. The leopard's head is raised along the top edge on foam pads for some dimension.

Stamps:
Leopard profile (CHF, retired)
Map from Safari Set 1 (Tanda Stamps)

Paper:
Tando Creative greyboard sheet
White cardstock

Ink:
Adirdonack by Ranger (Espresso)
Distress ink by Ranger (Vintage Photo and Black Soot)

Other:
Copic Markers
Tim Holtz Texture Fade - Cracked
Acrylic paints


Thanks for stopping by! You can check out all the details of how to play along in this month's challenge here - we'd love to have you play along!

Monday, 1 August 2011

Jackpot!

It's Week 26 at Less is More and because there were five Saturdays in July we have a "lucky dip" challenge this week - Feeling Fruity.

I had some die cut squares out on my desk (because I'd been cutting apertures for a project rather than cutting the squares themselves) and I thought they'd make a good basis for a "fruit machine" card teamed up with some cherries and a simple sentiment. Does this kind of fruit machine exist anymore? I remember there being one in our local chippie when I was a kid!

I put the squares back in to the die and ran a fine line marker around the inside, stamped and coloured the cherries and then stuck them to the card with foam pads over a strip of black card as the "winning line" to anchor them.

Stamps:
Kitchen Classics (Clear Art Stamps by Crafty Secrets) plus sentiment from a HOTP set.

Paper: smooth white, black

Ink: Brilliance by Tsukineko (Graphite Black)

Other: Copic markers, Nestabilities by Spellbinder, Crop-a-Dile


If you like to play with chipboard and masks in your papercrafting, why not check out the new Tando Creative Challenge - you have a month to play, there's no requirement to use Tando products on yor entry this month and there's a prize up for grabs so it's well worth a look! You can find the details of the theme and the prize here.

Thanks for stopping by!