It's Svenja's turn to set our challange over at Daring Cardmakers and she’d like us to be inspired by Frida Kahlo and/or Mexico. I guess we won’t be travelling for a while so we can craft our own vacations instead!
There’s a fabulous portrait of Frida Kahlo with hot pink lilies in her hair and looking at it reminded me of one of the very first stamps I bought (I’ve had it since at least 2007). It’s an unbranded grey rubber stamp, I believe the same image turned up later in a Graphic 45 set. I did doctor the eyebrows a little with a fineline marker, just to up the Frida factor!
I’m afraid the foil and metal flakes made this a horror to photograph but you probably get the idea. The sentiment was cut from double sided tape and foiled with a little roll I’ve had for over 25 years! I wish I’d placed it just a bit higher, closer to the image, but you live and learn. The ginkgo leaf was just hanging about on my desk and seemed to fit the sort of opulent feel so got added.
Actually, this turned into an older supplies fiesta, the gold paint splatters are made with pearlescent watercolour paint I bought years ago as a cheapo version of Twinkling H2Os - from The Works if I remember rightly.
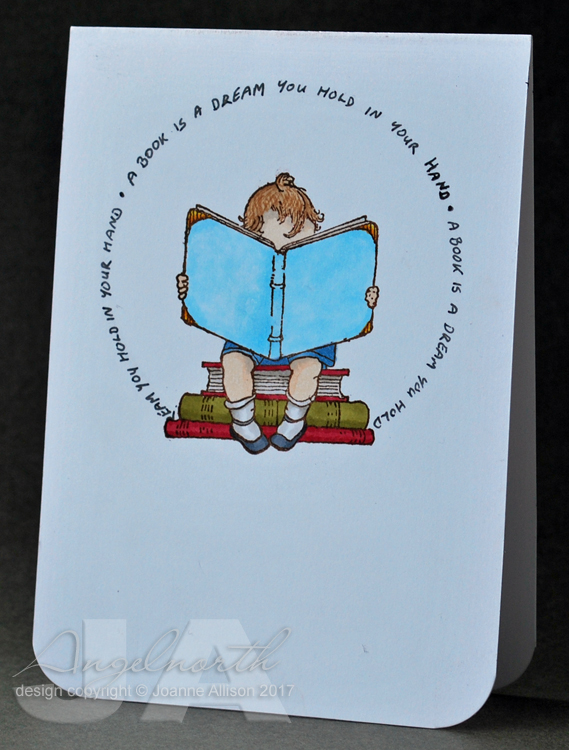
Stamps:
Woman with flowers (unbranded)
Paper:
Bristol board
Black
Ink:
Brilliance by Tsukineko (Graphite Black)
Other:
Copic markers
Ginkgo leaf die (Impression Obsession)
Phrase Set 2 (Spellbinder)
Gold gel pen
Pearlescent watercolour paint
Double sided tape
Gold foil
Mega Flake by Indigo Blu (Chariot of Fire)
Thanks for stopping by, hope you are all safe and well.
Showing posts with label copic. Show all posts
Friday, 17 July 2020
Friday, 5 June 2020
June Elements
As it’s the first Friday of the month it must be an “elemental” challenge over at Daring Cardmakers. Kathy has chosen our inspiration picture this time and it’s very summery indeed! Just chose at least three elements to include in your card.
I picked a drink with a slice of lemon and mint leaves, gingham pattern, a handwritten-style sentiment and yellow/green.
Although this stamp come with dies, I decided I didn’t want the white “halo” round the image this time so cut it out with scissors as it’s a reasonably easy shape.
Stamps:
Cocktail Time (Crafter’s Companion)
Birthday (Letter It range by Ranger)
Paper:
Bristol board
Ink:
Brilliance by Tsukineko (Graphite Black)
Other:
Copic markers
Gingham ribbon
Corner Chomper
Stitched rectangle dies A6 size (Paper Rose Studio)
Inspiration picture:
Thanks for stopping by, hope you are keeping safe and well.
Labels:
copic,
crafter’s companion,
DCM
Friday, 8 September 2017
International Literacy Day
It's International Literacy Day today according to UNESCO - since reading and literacy are close to my heart it seemed the perfect coincidence that it's my turn to set the challenge at Daring Cardmakers. So the challenge is to celebrate the written word - images of books or readers, a favourite literary quote, an author portrait... where will your imagination take you?
I've gone ultra clean and simple with this sweet little image and -eek!- my own handwriting.
The quote is from Neil Gaiman and I've just repeated it to make a circle round the little reader who is, I hope, lost in the world those words are creating.
I'm really happy with the Bristol card I found from a seller on eBay - it's a really good heavy weight for card bases (it's 335gsm) and even the strong shades of Copic marker didn't bleed through so this is a truly one layer card.
Stamps:
Story of Me by Crafty Secrets (no longer with us)
Paper:
Bristol board
Ink:
Adirondack dye ink by Ranger (Espresso)
Other:
Copic markers
Black fineline marker
Corner Chomper
Thanks for stopping by!
Labels:
CAS (clean and simple),
copic,
DCM,
olc (one layer card)
Friday, 3 March 2017
March Elemental
It's the start of a new month so Daring Cardmakers has an "elemental" challenge for us - Enfys is asking us to be inspired by at least three elements from her striking picture (it's at the bottom of this post if you didn't arrive here from the DCM blog).
I chose the grid lines formed by the window frames, the various vases and bottles (including some twigginess!), the shiny chrome of the light fitting and the overall black and white/muted colour palette.
The image was stamped first and masked with a Post-It note mask. I used low-tack tape to make the grid and gently sponged on grey ink. The image is lightly coloured with Copics (the tiny flash of yellow is a nod to the yellow book that drew my eye on the bookshelf).
I used Flitter Glu and shiny silver flake for the sentiment which looks pretty but does tend to "disappear" with the light at certain angles which made photographing it a bit tricky!
Stamps:
Vases (Serendipity Stamps)
Sentiment from Big Day Today (Waltzingmouse Stamps, retired)
Ink:
Soft Granite by Hero Arts
Brilliance Graphite Black by Tsukineko
Paper: Bristol Board
Other:
Flitter Glu and Sheffield Steel Mega Flake by Indigo Blu
Low tack tape
Copic markers
Charcoal pencil
Here's the inspiration picture:
Thanks for stopping by!
Friday, 27 January 2017
I want more...
It's dare day over at DCM and Miri is asking us what we'd like more of this year.
I count myself extremely fortunate to have what I have and struggled a bit with this challenge - all the things that popped into my head were pretty esoteric. In the end I decided to run with that and go for something more symbolic than concrete.
A while ago I was looking for a decent olive stamp. I remembered that on that hunt I saw a digital image that combines olive and oak. Since an olive branch symbolises peace and oak is traditionally associated with wisdom and strength I thought it would be a good representation of things we could use more of in the world right now.
I used Copic markers (cool and warm greys plus black) to colour the image then surrounded it with some charcoal pencil. I almost left it just like that but ultimately decided this die cut word was simple enough not to detract from the overall feel.
Supplies:
Olive and oak digital image (Power Poppy)
Copic markers (Warm Grey 1 and 3, Cool Grey 1, 3 and 5, Special Black)
Serenity word die set (Sizzix, retired)
Charcoal pencil
Corner chomper
Thanks for stopping by!
I count myself extremely fortunate to have what I have and struggled a bit with this challenge - all the things that popped into my head were pretty esoteric. In the end I decided to run with that and go for something more symbolic than concrete.

I used Copic markers (cool and warm greys plus black) to colour the image then surrounded it with some charcoal pencil. I almost left it just like that but ultimately decided this die cut word was simple enough not to detract from the overall feel.
Supplies:
Olive and oak digital image (Power Poppy)
Copic markers (Warm Grey 1 and 3, Cool Grey 1, 3 and 5, Special Black)
Serenity word die set (Sizzix, retired)
Charcoal pencil
Corner chomper
Thanks for stopping by!
Labels:
copic,
DCM,
die cuts,
digital image,
olc (one layer card),
Power Poppy
Monday, 11 July 2016
Birthday bubbles
I haven't used this bubble border in a while and as I started to make this card it made me think that stampers may have been ahead of the wave - this is definitely something that's relaxing to colour in and most stampers were doing that long before the popularity of "adult" colouring books!
This is very simple - just stamped on white and coloured with blue/green Copics with the corner cut off along the line of the wave and mounted on a black card base. I did add some clear Wink of Stella over some of the bubbles for a touch of glitz.
I chose the sentiment stamp as I think the crisp, straight lines of the font are a great complement to the fluid lines of the border image.
Although I made this for a female friend's birthday, I think you could easily use this sort of design for a masculine card, too.
Stamps:
Bubble Border by Lost Coast Designs
Sentiment from Big Day Today by Waltzingmouse Stamps (retired, although worth keeping an eye on Gina K for re-releases these days!)
Ink:
Brilliance by Tsukineko (Graphite Black)
Paper: smooth white and black
Other:
Copic markers
Wink of Stella pen (clear)
Thanks for stopping by!
Tuesday, 5 July 2016
Pretty Peony
My usual fallback position for a feminine card when I'm feeling at a loss for inspiration is a big flower! Sadly this peony seems to have fallen off the catalogue at Paperbabe but there are others around that would make an equally bold and pretty statement.
I stamped the image twice, once in grey for the leaf layer and again in pink for the flower, coloured them separately, cut the flower out and stuck it on with glue gel for a bit of dimension. I used a combination of Copic base layer colouring and pencil detailing with gold gel pen and fineline marker in the centre.
The card base had a central square masked off and sponged, with just a tiny bit of subtle stenciling up the right hand side for interest. A simple sentiment and a few iridescent sequins finish it off.
Stamps:
Peony and Bud by Paperbabe Stamps (retired, I think)
Say It All by Hero Arts
Paper: Smooth white
Ink:
Tim Holtz Distress ink by Ranger (Picked Raspberry and Tumbled Glass)
Shadow ink by Hero Arts (Soft Granite)
Brilliance by Tsukineko (Pearlescent Chocolate)
Other:
Cressida Stencil by Memory Box
Copic Markers
Gold gel pen
Fineline marker
Coloursoft and Prismacolor pencils
Pinflair glue gel
Sequins
Thanks for stopping by!
Friday, 24 June 2016
Glorious gardens
I've just managed to sneak in under the wire for this month's postcard swap on UKStampers where Jilly set the theme flowers/gardens.
We have a couple of patches of glorious poppies in our front garden which inspired my choice of stamp. They're just past their best now but we've had a couple of days where the sun has shone through the petals and really set them ablaze.
Things got a bit out of hand with my first attempt but I'd spent time colouring the poppy and liked the way it came out so I cut it out and used it, even though my original intention was to do my usual one layer job.
I found a masterboard sheet of A4 (using resist techniques) while looking for something else so I decided to use that as a base and go mixed media style. I added the stamped poppy, some rub ons, a bit of stencilling and some charcoal pencil.
I made the masterboard long enough ago that my list of supplies might involve a bit of guesswork this time but here it is in case anyone's interested in any of the elements.
Stamps:
Poppycock by Indigo Blu
Numbers border by Kaisercraft
Paper: Smooth white
Ink:
Tim Holtz Distress ink by Ranger (Barn Door, Mowed Lawn)
Versamark
Brilliance By Tsukineko (Graphite Black)
Other:
Copic markers
White Posca pen
Fineline marker
Charcoal pencil
Sequin Waste stencil by Tando Creative
White embossing powder
Gesso
Microglaze by Judikins
Dylusions (Fresh Lime, Vibrant Turquoise)
Rubons by Tim Holtz (Apothecary and Words)
Brick stencil by Dutch Doobadoo
Thanks for stopping by - if you're in the UK, please remember to be especially kind to each other (actually, that applies wherever you are - kindness costs nothing - but it seems particularly important that the UK should remember it at the moment).
Friday, 18 December 2015
More Brushos!
I needed a card for a friend with a Christmas birthday - her favourite flowers are poppies so this still looks a bit Christmassy because of the red/green combo and it would be easy to substitute a poinsettia if you were that way inclined.
I played with Brusho again to make the background, stenciling over the top after it was dry for a bit of subtle "texture" and to tie it together a bit. The poppy is coloured with Copics with layers cut out and stacked for a bit of dimension.
Stamps:
Poppycock by Indigo Blu
Sentiment from Say It All by Hero Arts
Paper: Bristol Board
Ink:
Brilliance by Tsukineko - Graphite Black
Tim Holtz Distress ink by Ranger - Mowed Lawn and Peeled Paint
Other:
Copic markers
Brusho - Leaf Green
Pinflair gel glue
Cressida stencil by Memory Box
Thanks for stopping by!
Labels:
Brusho,
copic,
indigo blu,
mask/stencil,
rubber stamping
Tuesday, 8 July 2014
Here comes summer!
For this month's postcard swap on UKStampers, Sam has asked us to include wheels. I thought of summer road trips and this surfer couple in their convertible seemed like the perfect set of summer wheels!
I had some fun with a shaving foam marbled background for a retro, tie-dye look and coloured the car and the stripe down the surfboard to match the vibrant shades. As usual, it has no embellishments so it can go through the post with no envelope when we swap.
If you've never tried it - shaving foam backgrounds are fun and each piece will be unique. Just squirt a layer of foam onto your craft mat (or other surface that's easy to wipe down). It doesn't need to be a particularly thick layer - I tend to squirt some foam and then use an old credit card to spread it out a bit. Add drops of reinker to the surface of the foam and then swirl with something like a bamboo skewer or thin paintbrush handle. Press a piece of card onto top, making sure you get contact with the inky foam all over the piece and then lift - it will look a big gooey mess at this stage! Scrape the inky foam off (I use the credit card again) and you'll have a marbled background. Wipe with a tissue or kitchen roll to remove any last traces of foam and then just leave it to dry and you can stamp on it directly or use it as a background piece.
I used Distress ink here but any dye ink is fine and alcohol inks work too - I've never tried it with pigment inks but I don't see why not. Try to choose colours that won't get too "muddy" in any areas where they mix together as you swirl.
This is actually the second background from one lot of foam - I just smoothed over the surface with the credit card after lifting the first one and added a few more drops of the inks, swirled again and pressed a second piece of cardstock on there. The first one had a little bit of Perfect Pearls as well as the ink - I'll use it for something in the future, I just happend to prefer the swirl pattern on this one for the postcard.
Stamps:
The Beach (retired CHF)
Paper: Smooth white
Ink:
Distress reinkers in Spiced Marmalade and Picked Raspberry
Brilliance Graphite Black
Other:
Shaving foam
Copic markers
Tracing Wheel
Corner Chomper
Thanks for stopping by!
Labels:
CHF,
copic,
GM,
postcard,
rubber stamping,
UKStampers
Saturday, 23 February 2013
Getting emotional
Sam chose "getting emotional" as the theme for this month's postcard swap on UKStampers rather than going for the ubiquitous Valentine theme. As ever, cards are to be posted without an envlope so flat is good!
I started thinking about the heart as the seat of emotion and the heart vs the head. I Googled to find an appropriate quote and used that as my starting point; it's just printed from the computer on the paper I used for the card.
I thought this vintage young lady fit the bill quite nicely - she might be learning something from that book but she's dreaming about something else as well, I reckon! Or perhaps it's a novel and she's feeling somebody else's emotion vicariously - Kathy's passion for Heathcliff or Anna Karenina's despair, maybe?
Stamps
Relish Reading (Rogue Redhead Designs)
Vintage Flourish (Indigo Blu)
Paper: ivory and dark chocolate
Ink:
Brilliance by Tsukineko (Graphite Black)
Tim Holtz Distress ink (Antique Linen)
Other:
Copic markers
Tracing wheel
Tonmorrow's the last day for this month's postcards but the new theme will be up soon after that if you fancy joining us and getting some happy mail!
Thanks for stopping by!
Labels:
copic,
postcard,
Rogue Redhead,
rubber stamping,
UKStampers
Tuesday, 15 January 2013
New beginnings
It's a new year as well as a new month so that means the theme for January's postcard swap over at UK Stampers is "new beginnings". It's been so long since I managed to blog anything that it feels like a new beginning here too!
In deciding what to do for this theme, I kept thinking about things that start small and become something fantastic. Having no caterpillar stamps to go with the obvious butterfly, I turned to seeds and plants and thence to trees. So although this is an autumn image, it does represent new beginnings with those little acorns!
My transfer of ink from transparency to postcard for the sentiment didn't work as well as I would have liked so I decided to give it a hand lettered feel by going over in fine line pen and a touch of brown pencil (apart from anything else, I'd already coloured the leaves and didn't want to waste them!).
As ever, our cards for this swap will be posted as genuine postcards (no envelope) so this is completely flat, not embellishments or bits to get stuck in sorting machines! If you fancy getting some happy mail why not come and join us - just make one card and get one in return.
Stamps:
Oak Branch by Beeswax stamps
Tiny "dream"sentiment from Mini Memories set by Crafty Secrets
Ink:
Adirondack dye ink by Ranger (Espresso)
Tim Holtz Distress ink by Ranger (Antique Linen)
Other:
Copic markers
Prismacolor pencil
Computer and inkjet printer
Copic Fineliner
Sequin waste mask by Tando Creative
Thanks for stopping by!
Labels:
beeswax stamps,
copic,
postcard,
rubber stamping,
UKStampers
Tuesday, 14 August 2012
Sun, sea and sand
The Design Team at Tando Creative is going seasonal this week and being inspired by "sun, sea and sand".
I've made a simple ATC using one of the white board shapes as a base. I love the fact they're really sturdy so they're easy to handle and you don't need to stick anything on the back of your work to make it feel stable.
Small stamps are perfect to create "holiday snapshots" in the film strip cells and I've added a paperclay starfish that has been in my stash for years - I made it in a polymer clay mould that was created from a real starfish that was in a bowl of decorative shells I picked up in a charity shop.
Supplies:
Chipboard ATC (Tando Creative)
Seaside stamp set (Clear Art Stamps by Crafty Secrets)
Black card
Tim Holtz Distress ink by Ranger (Tumbled Glass)
Versafine ink by Tsukineko (Onyx Black)
Adirondack ink by Ranger (Espresso)
Filmstrip die (Tim Holtz Alterations/Sizzix)
Copic markers
Paperclay starfish
Thanks for stopping by!
Labels:
ATC,
copic,
rubber stamping,
tando
Monday, 12 March 2012
Floral gift tag
Here's another guest project for the Chocolate Baroque Design Team blog.
While I had the Copic and Prismacolor pencils out to color the image on the seed packet I shared last week {here if you didn't see it and would like to}, I also coloured the floral spray from the Fragrant Honeysuckle set and turned it into a pretty tag. I think this would be a lovely addition to a gift of a bunch of flowers - perhaps for Mothers Day?
I stamped and cut out with a Beaded Oval Nestability die and then carefully cut the beads off, cutting round the flower head and leaves that extended beyond the basic oval shape. I coloured the image with Copics and Prismacolor pencils and then sponged ink round the edge. I stuck the coloured piece onto a second beaded oval die cut and finished with a simple ribbon at the top.
I used a Copic marker to colour white silk ribbon on this and the seed packet project - it's a great way to get a match for the colours in your image.
Stamps:
Fragrant Honeysuckle (Chocolate Baroque)
Paper:
Cryogen White
Ink:
Adirondack by Ranger (Espresso)
Jenni Bowlin ink by Ranger (Soap Powder)
Other:
Copic markers
Prismacolor pencils
Beaded Ovals Nestabilities by Spellbinder
Silk ribbon
Thanks for stopping by today!
Labels:
copic,
Prismacolor pencils,
rubber stamping,
spellbinder,
tag
Friday, 17 February 2012
Weathered copper poppies!
I spotted the latest Gingersnap Creations challenge - use a faux technique - through Jean's blog and it gave me the kick I needed to do something a bit special for a background on a birthday card. I actually used the same faux technique as Jean had chosen for her card - faux verdigris copper - as textural stuff always looks good and in this case the colour contrast was perfect with the bright poppies.
I didn't have any copper paint in my stash but I did have a copper Krylon leafing pen so I used that to colour my embossed cardstock before giving it the treatment with acrylic paint (I used little tubes, not dabbers and used two greens plus a blue) and gesso. A tiny bit of metallic rub-on wax on the high spots brought out the pattern a bit more.
I coloured my poppies with Copics and trimmed for an "out of the box" panel and to keep with the background I used copper embossing powder to add the sentiment on top of the image.
I used a bit of wide cotton crochet lace and some simple matting with dark chocolate cardstock to finish.
This is for a neighbour/friend's 70th birthday - I just handed it over and she was very pleased with it. Always nice to see a reaction to your cards and it doesn't happen very often since most are posted!
Stamps:
Poppies (Clear Art Stamps by Crafty Secrets)
Say it Loud (Waltzingmouse Stamps)
Paper: Smooth white and bitter chocolate
Ink:
Adirondack by Ranger (Espresso) Tim Holz Distress ink by Ranger (Vintage Photo)
Versamark by Tsukineko
Other:
Copic markers
Detail embossing powder (copper)
Couture Creations embossing folder (Tied Together)
Cotton lace
Acrylic paints
Gesso
Metallic rub-ons
Krylon Leafing Pen (copper) Thanks for stopping by!
Monday, 19 December 2011
Hippo Birthday

I did try putting a circle behind the hippo but it looked better without.
Stamps: Heloise Hippo (High Hopes)
Paper: Red, white, navy
Ink: Brilliance by Tsukineko (Graphite Black)
Other:
Typeset decorative strip die (Tim Holtz Alterations/Sizzix)
Copic markers
Tracing Wheel
Corner Chomper (We R emory Keepers)
Birthday embossing folder (Cuttlebug)
Thanks for stopping by - hope your Christmas preprations are all under control!
Labels:
copic,
embossing,
kids,
Male birthday,
rubber stamping
Tuesday, 19 April 2011
Birthday poppies
I'm sharing the birthday card I made for my mum today - happy birthday Mum!
I'm also hosting the challenge at the Crafty Secrets member forum over at Splitcoast stampers and I'm asking players to use something pearly on their projects. I've used a pearlescent cardstock and lots of little pearls along the top of the lace trim.
This is a slightly larger size than I usually do at 7" x 5" but the poppy stamp is substantial enough to carry it. I coloured and cut out the third poppy head so that I could make it overlap the tip of the sentiment panel.
Stamps:
Poppy plus sentiment from Sweet Kids set (both Clear Art Stamps by Crafty Secrets)
Paper:
Cryogen white
Dark red
Ink:
Adirondack by Ranger (Espresso)
Tim Holtz Distress ink by Ranger (Antique Linen, Vintage Photo)
Other:
Copic markers
Vintage lace
Pearls
Nestabilities Labels four
Sewing machine and thread
Thanks for stopping by!
Labels:
copic,
Crafty Secrets,
female birthday,
rubber stamping,
spellbinder,
vintage
Tuesday, 12 April 2011
Yellow Rose
I'm combining challenges again today. I hadn't come across the Copic Creations blog before but saw it in a post Sandy made on the Crafty Secrets blog because they are sponsoring this week's challenge. I decided to pair up their challenge to use your favourite Copic technique with the Crafty Secrets member company forum challenge at Splitcoast Stampers this week where Darlene has asked us to use yellow.
I don't really have a single favourite technique so I settled on doing something I haven't done for a while and gives an effect I love - combining Copics with coloured pencils. You get speed and vibrancy from the Copics and then control and depth by adding extra detail with pencils.
I've use the large stamp from the Crafty Secrets Rose set ( this is a 5" square card so you can see it's a good sized image) and added the little wording stamp which has the English and Latin names.
I think yellow roses symbolise friendship so this would be a nice card to send to a special friend for just about any occasion.
Stamps:
Rose set (Clear Art Stamps by Crafty Secrets)
Paper:
Smooth white
Radiant paper pad (Heartwarming Vintage by Crafty Secrets)
Ink:
Adirondack by Ranger (Espresso)
Other:
Copic markers
Prismacolor pencils
Sewing machine and thread
Silk ribbon
Pearls
Thanks for stopping by!
Labels:
copic,
Crafty Secrets,
Prismacolor pencils,
rubber stamping
Wednesday, 6 April 2011
Birds of a feather
Carol and I had fun last year doing a series of technique pieces with Tando chipboard. We thought we'd have another play for 2011 so over the next few weeks we'll be revisiting some of the 2010 products and techniques and throwing in some new ones, too!
We decided to start simply with some colouring on the white lined board. I've used an inchie, a twinchie and two dominos to make this little wall hanging.
The surface of the board is smooth enough that it takes a detailed image easily, even stamping with a dye-based ink and not resorting to Versafine! Sponging ink around the edges of the piece is also easy as the ink goes on smoothly for a nice graduated effect.
Perhaps most importantly for many people, Copics work well directly on the board - yay! I blended three shades of brown on the bird's breast and belly as well as on the single feather image. The eggs have a slightly deeper blue shaded in at the base, too.
Being nice and sturdy, the board is also easy to handle for fiddly jobs - I added Dymo label words to a domino shape, covered with aluminium tape and burnished over to get the raised lettering to show through. A little acrylic paint and a light sanding and you're done.
I punched holes in all the pieces with a Crop a Dile and wired it all togther with some twigs in between. Spring may not have sprung with full convinciton yet but maybe this little hanging will encourage it along the way!
Stamps: Bird Notes (bird and feather), Farm Chicks (egg) - Clear Art Stamps by Crafty Secrets
Paper: Inchie, twinchie and domino shapes by Tando Creative (Tando stockists list can be found here)
Ink:
Adriondack by Ranger (Espresso)
Distress ink by Ranger (Tumbled Glass)
Other:
Copic markers
Dymo label maker
Aluminium tape
Acrylic paint (raw umber)
Crop a Dile
Twigs
Florist's wire
Thanks for stopping by!

The surface of the board is smooth enough that it takes a detailed image easily, even stamping with a dye-based ink and not resorting to Versafine! Sponging ink around the edges of the piece is also easy as the ink goes on smoothly for a nice graduated effect.

Being nice and sturdy, the board is also easy to handle for fiddly jobs - I added Dymo label words to a domino shape, covered with aluminium tape and burnished over to get the raised lettering to show through. A little acrylic paint and a light sanding and you're done.
I punched holes in all the pieces with a Crop a Dile and wired it all togther with some twigs in between. Spring may not have sprung with full convinciton yet but maybe this little hanging will encourage it along the way!
Stamps: Bird Notes (bird and feather), Farm Chicks (egg) - Clear Art Stamps by Crafty Secrets
Paper: Inchie, twinchie and domino shapes by Tando Creative (Tando stockists list can be found here)
Ink:
Adriondack by Ranger (Espresso)
Distress ink by Ranger (Tumbled Glass)
Other:
Copic markers
Dymo label maker
Aluminium tape
Acrylic paint (raw umber)
Crop a Dile
Twigs
Florist's wire
Thanks for stopping by!
Labels:
chipboard,
copic,
Crafty Secrets,
Dymo,
rubber stamping,
tando
Wednesday, 23 March 2011
Little reader
I'm combining challenges again today - Effie is providing a fortnightly sketch over on UKStampers (this is number 6) and in the Crafty Secrets member forum at Splitocoast Stampers, Marcy has challenged us to layer up our images this week.
Here I've layered the hands onto the book, the book onto the little reader and the little reader onto the stack of books (so four images all together). I used scraps of card between each layer so there's a little dimension but not too much. Perhaps it's because I have always been an avid reader myself that this is one one of my favourite stamps ever!
There's a lady in my area who runs a little enterprise called "What Katy did next". She sells lots of recyled stuff aimed at the crafter - one of the things she does is rescue pages from books that are not fit for resale through charity shops etc and puts them together into packs of 50 assorted pages. You could get anything from Beano album pages through sheet music and atlas pages! My pack had quite a few children's story book pages and I've used one of them here. I rubbed gesso onto the page with my finger (using a Nestie as a stencil) and doodled a border round it to create a little "story world" for him.
Mats and decorative strips are all coloured with Copics to match the colours I used on the image.
Stamps:
Story of Me (Clear Art Stamps by Crafty Secrets)
Paper:
Old book page
Smooth white
Ink:
Adirondack by Ranger (Espresso)
Distress ink by Ranger (Vintage Photo)
Other:
Copic Markers
Tim Holtz Alterations die by Sizzix (Brackets)
Vintage buttons
Gesso
Nestability by Spellbinder (used as stencil)
Zig drawing pen
Sewing machine and thread
Thanks for stopping by!
Labels:
copic,
Crafty Secrets,
kids,
rubber stamping,
vintage
Subscribe to:
Posts (Atom)