Showing posts with label embossing. Show all posts

Thursday, 21 May 2026

Happy New Home!

The Die Cut Divas challenge this month is all about celebrations, so I decided to concentrate on die cutting and embossing for a card to celebrate a move to a new home when my hubby asked if I could make something for him to give to friends.

Last time I made a new home card, I observed I didn’t have anything like a pot plant which would have filled a space in the layout. I fixed that by picking up a couple of MFT die sets from someone having a crafty de-stash on eBay and I’ve used several of them here. I used Copics to colour the pots (I went with traditional terracotta) and the foliage and then added a little sparkle with a Spica glitter pen. I thought a white embossed brick wall might make it look like a whitewashed conservatory. The sentiment is computer generated and cut with a stitched rectangle die to make “shelves” for the pots.

Supplies:
Potted Plants and Plants & Pots die sets (MFT)
Brickwork 3D embossing folder (Tim Holtz/Sizzix)
Copic markers
Spica glitter pen (green)
White paint pen (Posca)

Stitched rectangle dies A6 size (Paper Rose)
Bristol board

What are you celebrating? Whatever it is, if you use a die or an embossing folder, why not share with the Die Cut Divas here


Thursday, 9 April 2026

Brimming over with joy

This month's theme at Christmas Kickstart (where host Jo is being ably assisted by elf Gail) is hats — hats on their own, hats on people, hats on critters — if it's Christmassy and there's a hat involved you're good to go!


Retro Rubber are playing tic tac toe and it's a wintery one as things got out of kilter with their enforced change of platform so I'm playing there too — right hand column (tag, holly, rhinestones) and also bottom row (die cut, snow, rhinestones). The holly and the rhinestones are both tiny but they're there on the snowman's hat band. The Hero Arts set (holly and sentiment stamps, word die cut) has been in my collection since 2017 I think.

This is the first outing for the snowman die from the Cool Yule set. I went very much my own way though — I used the nose intended for Santa to make a tangerine rather than a carrot nose, didn’t use the monocle and replaced the star accent for the hat with some stamped and fussy cut holly with tiny gem berries. The eyes are Enamel Accents, I drew on a wiggly mouth and he’s wearing the scarf that belongs to the reindeer in the set rather than his own bow tie!

Stamps:
Joy Stamp & Cut (Hero Arts, had mine since 2017)

Paper: Bristol board

Ink:
Memento Luxe by Tsukineko (Love Letter)

Other:
Cool Yule dies (Tim Holtz/Sizzix)
Softly Falling embossing folder (Stampin' Up!, retired)
Tags dies (Tim Holtz/Sizzix)
Copic markers
White pencil
Posca pain pen (white)
Enamel Accents by Ranger (black)
Nail art gems
Black fineliner
Corner Chomper


Thanks for stopping by!

Tuesday, 17 February 2026

Deck the halls

A second card for the February Christmas Kickstart challenge where we've been invited to a sing-a-long! I'm combining with Retro Rubber this time who are back after a break while they changed platform. Use stamps older than a year and you can play along, too!

This turned out a bit rustic, a bit vintage but quite festive, I think. Retro Rubber has a tic tac toe challenge at the moment — I chose the middle line of kraft, free choice (I went with fussy cutting), embossing. I think my song for Christmas Kickstart is reasonably obvious!

After fussy cutting the stamped holly, I decided the card needed something a bit extra. Although it's at a different scale I thought the die cut holly sprig worked OK and it had the advantage that the leaves were small enough I could overlap the sprig onto the sentiment panel without obscuring any of the pretty lettering. I hand drew the veins so it was closer to the style of the stamped holly.

I've given the lettering a tiny bit of sparkle by using a Spica glitter pen to trace over the edges of the stamping.

Distress ink in Antique Linen always goes well with kraft and it just softens the edges of the white sentiment panel a bit. 

Stamps:
Noel (Waltzingmouse Stamps, no longer with us 
 I've had the set at least a decade)
Holly (magazine freebie stamp, I've had it at least five years)

Paper:
Kraft
Bristol board
Black

Ink:
Memento Luxe (Love Letter)
Tim Holtz Distress ink by Ranger (Antique Linen)
Brilliance by Tsukineko (Pearlescent Chocolate)

Other:
Moonlit berries embossing folder (Couture Creations)
Square Nestabilities by Spellbinder
Copic markers
Red Spica glitter pen
Christmas roses dies (Sue Wilson/Creative Expressions) 

 Thanks for Stopping by!


Wednesday, 11 February 2026

My punny Valentine

I wanted to make a Valentine for my DH but nothing was really gelling until I saw the Sisterhood of Snarky Stampers challenge this month — Black, Black Heart. When combined with Lost Coast Designs and We Love Stamping who both have the theme of Hearts this happened.

I've had this embossing folder for ages (I had to have it after seeing this card on Jo's blog but have failed to use it until now! Looking at it again reminds me how much I miss the Let’s Squash It! Challenge). The folder gives a fantastically deep impression. I guess black is not traditional but it is dramatic!

The original plan was to print out a quote from Einstein about love and gravity but the printer is playing up and then this pun popped into my head and refused to go away. That meant I spent ages cutting and then sticking on individual letters -- good job it's going to someone special, eh? 

I ran a copper gel pen round the edge of the embossed piece, just for a bit of contrast


Stamps:
Einstein (Carmen's Veranda)

Paper:
Smooth black
Bristol board 

Ink:
Versafine by Tsukineko (Onyx Black)

Other:
Typewriter font dies (Tim Holtz/Sizxzix)
Romantic 3D embossing folder (Sizzix)
Copper gel pen
Stitched rectangle dies A6 size (Paper Rose)
 

Thanks for stopping by!


Friday, 1 March 2024

Elements for March

First Friday of the month is always an "elemental" challenge at Daring Cardmakers — choose at least three elements from the inspiration picture to kickstart your project.

This month's picture has a very serene quality. I decided that leant itself to sympathy cards and since they're rarely in my stash and you inevitably don't really feel like making one when you need it, I went that way.

From the inspiration picture I chose some of the colours, the feathers from the dream catchers, the macrame made me think of this embossing folder and I used twine to tie the feathers together. The feathers are gently edged with Vintage Photo ink. 

Stamps:
Big Day Today (Waltzingmouse Stamps, no longer with us)

Paper:
Bristol board
Kraft

Ink:
Brilliance by Tsukineko (Pearlescent Chocolate)
Tim Holtz Distress ink by Ranger (Vintage Photo)

Other:
Feathers
Linked circles
Nail art pearls
Crochet thread
Cropadile

Here's our inspiration this week:


Thanks for stoppig by!

Friday, 16 June 2023

Make it masculine

Dawn is setting our challenge at Daring Cardmakers this week and she’d like to see some more masculine makes.

The Tim Holtz lumber folder makes a good base for a masculine card, I think. I cut an extra “plank” to extend it for the proportions of the card. As there’s a join between each plank in any case, it’s not too difficult to make it look fairly seamless.

I rubbed a Neocolour water soluble crayon over the embossing (keeping it on the folder so it has support underneath is a good idea) and then smudged with a damp finger. 

Simple white die cut foliage tied with a tomato paste dot and a scripty sentiment finish it off. 

Supplies:
Tim Holtz/Sizzix embossing folder (Lumber)
Tim Holtz/Sizzix Wildflower dies
Poppystamps die (Happy Birthday Poe Script)
Neocolour crayons
Bristol board
Kraft card
Brown fineliner
Tomato past tube


Friday, 16 December 2022

Believe

It’s Friday so it must be time for a new challenge at Daring Cardmakers — it’s our last before Christmas and follows our previous one word prompts. Today’s word is BELIEVE.

I couldn’t resist tying in with Let’s Squash It where the theme is snowflakes and stars. Sadly, LSI is calling it a day, at least for the time being. I’ve been really honoured to be chosen as Empress three times. Gail and Jo have been fabulous challenge hosts and all the regular players will be sad to wave farewell. Thank you Gail and Jo!

For today’s card I used a sentiment that includes the DCM word of the week, stamped and heat embossed on vellum with torn edges and laid over a background of sanded embossed snowflakes. The stars are die cut from silver card and I added glitter to the largest one for a bit extra festive pizzazz. I haven’t used the confetti die that produces the little stars for ages — it was nice to “rediscover” that!

It’s wintery and festive with plenty of die cut action so I’m linking up at Die Cut Divas, too.

Wishing you all a happy, healthy and peaceful festive season.

Stamps:
Sparkle All the Way (Crafter’s Companion)

Paper:
Bristol board
Textured blue (came with the folder)
Vellum
Silver mirri 

Ink:
Versamark  by Tsukineko

Other:
Glamour dust by DecoArt (Crystal)
Stitched rectangle dies, A6 size (Paper Rose)
Snowflakes embossing folder (Darice)
Stars Framelits (Sizzix)
Confetti die (Mama Elephant)
Bright white detail embossing powder (Wow!)


Friday, 18 November 2022

White out

It's time for a new challenge at Daring Cardmakers and we have another in the series of one word prompts in the run up to Christmas. This week’s word is WHITE. 

I’m combining again with Let’s Squash It (any embossing folder on a Christmas card) and Die Cut Divas (where this month anything goes with a die and/or embossing folder). 

My mostly white card features embossed snowflakes and Snowy Sophie who has just a touch of colour. I had some white on black computer-generated sentiments left on my desk from last week’s card so I used another one here. 

I've lent most of my Christmassy embossing folders to my dad but forgot about this one as it was in my pile of "not yet used stuff" rather than in the Christmas box - sorry Dad!

I ran a line of pearl paint pen round the outside of the die cut embossed rectangle and poured glitter on it. Sophie is cut out (I redrew her arms onto the card with a fineliner so I didn’t have to cut out the fiddly bits) and given a sparkly snowdrift to nestle into using the same paint and glitter. 

Stamps:
Snowy Sophie (Cornish Heritage Farms, no longer with us)

Paper:
Bristol board

Ink:
Brilliance by Tsukineko (Graphite Black)

Other:
Copic markers
Stitched rectangle dies, A6 size (Paper Rose)
Snowflakes embossing folder (Darice)
Glamour Dust by DecoArt (Crystal)
Pearl Pen by DecoArt (Ice White)
Black fineliner 


Friday, 11 November 2022

Holly jolly

It's time for a new challenge at Daring Cardmakers and we have a series of one word prompts in the run up to Christmas. This week’s word is HOLLY. 

I’ve combined with the new challenge at Let’s Squash It which is asking for any embossing folder on a Christmas card. I stamped the holly on a die cut square and then used the folder to emboss it so that all the grungy detail and the wording is on that layer. To get smooth leaves, I stamped again on a scrap of card, coloured the holly and cut it out. It’s stuck on with gel glue so the leaves are lifted off the embossed layer a bit. A wonky border doodled with a gold gel pen, some sparkle on the berries, a computer-generated seniment and some enamel dots finish it off.

The Die Cut Divas have an “anything goes” theme this month, I used an embossing folder and a die here so I’m linking up there too. I wanted a square that was bigger than the Nesties I have so I used a square frame die but placed my top plate so that I only cut one outer edge, then turned it to cut the next and so on — a bit fiddly but it worked! Of course I then obscured the stitching effect by embossing the piece so I should probably have just used a knife and ruler to cut a square!

Stamps:
Inked Holly (Visible Image)

Paper:
Bristol board

Ink:
Brilliance by Tsukineko (Graphite Black)

Other:
Copic markers
Stitched square frame dies (Paper Rose)
Pine planks embossing folder (Stampin Up)
Clear Wink of Stella pen
White Enamel Accents by Ranger
Gold gel pen 


Monday, 10 October 2022

Autumn leaves

Time for a new challenge at Let's Squash It  and I’m delighted to be joining Jo and Gail as Guest Designer again this month. 

The theme this time is trees and/or leaves. I did a bit of both with trees on the embossing folder and die cut leaves for good measure. This little chap had a wintery adventure at this woodland spot last year, padding through snow between the trees — I thought it might be fun to give him some crunchy autumn foliage to kick up this year! I inked a piece of card with a few Distress inks then die cut the leaves to put under his feet.

Stamps:
Pointy Hat Gnome (Lost Coast Designs)
Sentiment from Essential Messages (Hero Arts, retired)

Paper:
Bristol board 

Ink:
Brilliance by Tsukineko (Graphite Black, Pearlescent Chocolate)
Tim Holtz Distress ink by Ranger (Mustard Seed, Rusty Hinge, Spiced Marmalade)

Other:
Woodland embossing folder (Stampin’ Up!)
Leaves dies (Impression Obsession)
Stitched rectangle dies, A6 size (Paper Rose)
Fineline marker
Copic markers
Gel glue

Why not break out an embossing folder and something with trees or leaves and come join the fun, there’s always a little prize on offer for a randomly chosen winner at Let’s Squash It and it’s always a lovely bunch of crafters taking part!

Oh, and with his drift of autumn leaves and backdrop of tree trunks, Gnomie thought he should enter the Four Seasons October challenge, too!


Friday, 23 September 2022

Changing seasons

Our challenge at Daring Cardmakers this week is being set by Dawn and she’d like to see something influenced by the changing seasons.

I’ve opted for the obvious autumnal feel and also combined with the current challenges at Let’s Squash It (emboss two thirds of your card) and Die Cut Divas (autumn). 

On my daily walk up the lane I pass lots of interesting dry stone walling, some of it a little tumbledown, some of it mossy or supporting brambles as well as keeping the cows and sheep where they should be! I haven’t used this folder for ages and I thought it would be nicely rustic with the autumn leaves. I added a bit of ink to the folder before embossing to accentuate the lines.  

Unusually for me, there’s no stamping (other than the sentiment). 

Stamps:
Sentiment from Big Day Today (Waltzingmouse Stamps, no longer with us)

Paper:
Bristol board
Kraft

Ink:
Versafine by Tsukineko (Vintage Sepia)
Tim Holtz Distress ink by Ranger (Vintage Photo)

Other:
Dry stone wall embossing folder  (Crafter’s Companion) 
Pan pastels
Leaves dies (Impression Obsession)
Corner Chomper 
Nail art gems


Friday, 2 September 2022

September elements and link in the chain

A two-in-one post today since the second of the month (reveal day at Card Chain Challenge) coincides with the first Friday (our “elemental” challenge at Daring Cardmakers). 

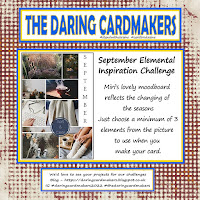
Miri has chosen our DCM mood board for September — as ever, just chose at least three elements to kickstart your project. I chose the surface rings on the puddle, the autumn leaves and a circle. I used Pan Pastels to colour the die cut leaves and added the framing for the circle as an afterthought so it’s drawn on with a fineliner and a Copic marker. The dots are my trusty tomato paste tube and a few tiny nail art gems.

Just realised Die Cut Divas have an autumn theme this time around so I’m linking this card up there, too. 

Stamps:
Sentiment from Say It All (Hero Arts, retired)

Paper:
Bristol board

Ink:
Versafine by Tsukineko (Vintage Sepia)

Other:
Retro circles embossing folder  (Tim Holtz/Sizzix) 
Pan pastels
Circles dies (Spellbinder)
Leaves dies (Impression Obsession)
Stitched rectangles A6 size (Paper Rose)
Tomato paste tube
Nail art gems

My Card Chain Challenge card went to Pat in Texas this time. From the options on offer I chose the theme of fruit and flowers and gave this lovely lemon set its first outing (I have blogged another card with it already but this one was made and sent before that was made). It’s almost my usual one layer card for CCC, just the little blossom is die cut and added over the base layer. 

There’s still time to sign up for the September chain if you fancy it, details here.

Stamps:
Lemon Blossom (The Greetery, plus matching dies)

Paper:
Bristol board

Ink:
Brilliance by Tsukineko (Pearlescent Chocolate)
Various yellow, green and pink inks (I failed to keep note!)

Other:
Copic marker
Nail art gems
Corner Chomper


Friday, 19 August 2022

Cake and candles

I’m combining challenges again today! Shabneez has chosen our theme at Daring Cardmakers and as she has lots of family birthdays to celebrate in August, she’d like to see birthday card ideas featuring candles and/or cake.

Let’s Squash It’s challenge of a shaped card combined with any embossing folder is ongoing so I decided to play again there — the cabinet card shape I made last week was looking very lonely in the challenge gallery until the lovely Robyn joined me on Wednesday but I'm sure Jo and Gail would love to see a few more shaped cards!

I kept the shape really simple this time, using the largest die from a really old Spellbinder set, but it still looks a bit different than your regular straight edges. Wafer thin dies tend not to want to go through two layers of base weight cardstock — I ran the folded base through the machine once which cut the top layer and made a good indentation in the bottom one. You can then flatten it out and use the indentation to reseat the die and place your top plate so it lines up along the fold of the card to make sure you don’t cut more than you intended. I then die cut a full front out of black cardstock, embossed it, dry brushed with metallic acrylic paint and stuck to the card base. 

The cake is stamped, coloured with Copics and fussy cut then stuck on with gel glue with a glittery gold frame to spotlight it. The sentiment is cut with a small rectangle, modified make it longer.

I realised when dry brushing the card front that there is even a cake with candles (top left) in the embossing so it’s double cake all round!

Stamps:
The Cafe (Cornish Heritage Farms, no longer with us)
Sentiment from Essential Messages (Hero Arts, retired)

Paper:
Bristol board
Black
Gold glitter

Ink:
Brilliance by Tsukineko (Pearlescent Chocolate)

Other:
Birthday embossing folder (Cuttlebug)
Copic markers
Labels 8 dies (Spellbinder)
Fine frames die, circle (Altenew)
Stitched rectangles A6 size (Paper Rose)
Espresso metallic paint (DecoArt)

Friday, 10 June 2022

Pearls of widsom

It's my turn to set the challenge at Daring Cardmakers and as one of June’s birth stones is pearl I thought we’d take our inspiration from all things pearly.

I started with a piece of pearlescent cardstock in a pale silvery grey, embossed and sprayed it with some ink and then polished some of that off the high spots of the embossing. 

I decided I wanted to stamp a sentiment round the curve of the shell which was a bit fiddly but made possible with the MISTI. I couldn’t get it quite as dark as I wanted though so I ended up going over it (very carefully) with a very fine marker.

I gave the whole thing a bit extra pearliness by adding some dots in different sizes along the bottom with a pearl pen and finished by drawing a wonky frame round the square with a metallic pencil. 

I’m guest designing with Let’s Squash It for the month of June and took inspiration from the challenge there too — hop over to see what it is! The sample I made in advance is here.

Supplies:
Shell Beauty embossing folder (Spellbinder)
Pearlescent silver and black cardstock
Adirondack dye ink spray (Stream)
Brilliance by Tsukineko (Graphite Black)
Sentiment stamp from Seaside set (Crafty Secrets, no longer with us)
Viva Decor pearl pen (Ice White)
Fineline marker
Metallic pencil (Lyra)

Thanks for stopping by!


Thursday, 9 June 2022

Make it Manly

It’s time for a new challenge at Let’s Squash It and I’m delighted to be joining Gail and Jo as guest designer for this one. You can use any embossing folder you like as long as your card is manly! All the details are here.

My hubby is a bit of a wine buff so when I saw this stamp and die set at a bargain price a few months ago I knew I had to get it! Several other family members and friends will likely be seeing it too. There’s a die as well but I actually cut the row of corks out by hand as I wanted to make it shorter by cutting one off the end - it's an easy shape to cut. The word is die cut from tomato paste tube and has come out very shiny on the photo! 

The embossing folder seemed appropriate as I thought the circles might be a bit reminiscent of cork ends and the optical illusion of them bulging in the centre might be an indication of a glass too many!

I find keeping a limited, neutral colour palette is always useful when you’re trying to make a more masculine card.

Stamps:
Wine corks (Spellbinder, stamp and die set)

Paper:
Bristol board and smooth black

Ink:
Brilliance by Tsukineko (Graphite Black)

Other:
Copic markers
3D Circles embossing folder (cArt-US)
Stitched rectangles dies, A6 size (Paper Rose)

Thanks for stopping by - we'd love to see you over at Let's Squash It with some manly makes!


Friday, 29 April 2022

Celebrate

We're celebrating at Daring Cardmakers this week - create a card for any occasion and include the word "celebrate" in your make.

I've combined with the current challenge at Let's Squash It which wants geometric or repeating patterns in our embossing.

I embossed a piece of engraving board (scraperboard when I was a kid!) in an old Spellbinders folder then sanded away the black coating to reveal the copper foil. Some white die cut flowers, a heat embossed sentiment and a little dome made from tomato paste tube metal and call it done.

Supplies:
Bristol board
Birthday (Letter It stamp range by Ranger)
So Trendy (Mbossibilities by Spellbinder)
Wildflower Stems I (Tim Holtz/Sizzix)
Copper engraving board
Versmark by Tsukineko
Detail embossing powder (copper)
Tomato paste tube